Land Rover Discovery Series I Tom Woods Double Cardan (CV) Driveshaft Install
The following describes the install of a Tom Woods custom driveshaft on a 1997 Discovery Series I.
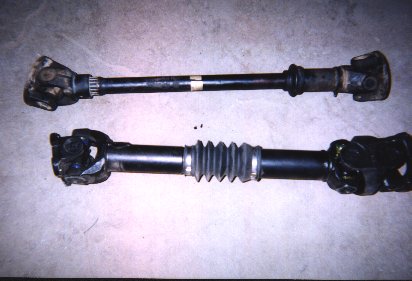
The Driveshaft Aedofab can provide you with a Double Cardon or Multiple Double Cardon driveshaft measured to fit your Land Rover so you can avoid the step of measuring before ordering. Contact us for more information. Here are some shots of the driveshaft from Tom Woods. As you can see, it uses an Aluminum adapter plate to connect to the transfer case. 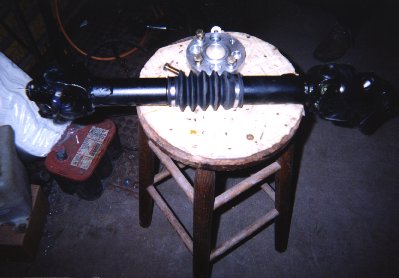
The Install The install is pretty straight forward and is simply executed by removing your stock drive shaft and replacing it with the Adapter Plate and Tom Woods shaft. Follow these steps:Step 1: Removing the old drive shaft Unbolt the four bolts which attach it to the front differential. You don’t absolutely have to do this end first but it makes the over process easier. Next, take a look at the end of the shaft which connects to the transfer case and remove whatever nuts you can get to easily. After you take care of those, the following step is to put the transmission in neutral and ensure that the center diff is not locked. Then, rotate the shaft until you can easily get at another bolt. Once you can, put the transmission in park and lock the center diff. This will keep the shaft from rotating as you unbolt the rest of it. Repeat this procedure as many times as necessary until you can take it off. You will notice that for this end, you cannot remove the original bolts, only the nuts.Step 2: Putting on the adapter This is the easiest part of the install. Simply slide the adapter over the bolts that are there, put the supplied washers in place, and bolt it on. Once installed, it looks like this: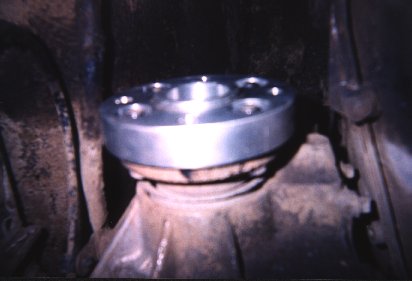
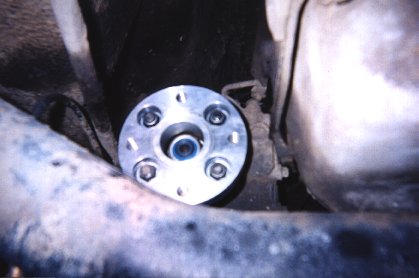 As you can see, the adapter is threaded to accept the supplied bolts. Be sure not to forget the lock-washers.
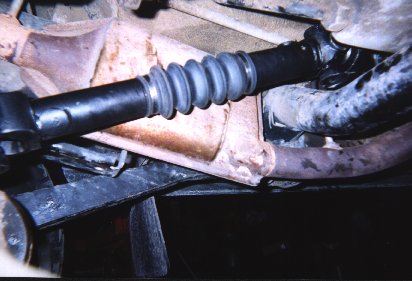
Step 3: Attaching the new driveshaft The driveshaft, as shown in the pictures above, has a double cardan joint at one end, which bolts to the transfer case. Opposite of removal, it is easier to put the end on near the transfer case first, then do the end near the diff. The hardest part about this step is holding it up while you try to thread the bolts onto the adapter. Be patient and relax, and you’ll get it. Use the same method for removing the old one to be able to get at bolts to torque them down. After that, bolt the other end back on using the stock bolts. That’s it!! Once you have it all back together, it looks like this.